When it comes to home security, taking matters into your own hands can be both empowering and cost-effective. But where do you begin? How can you ensure that your DIY security system is up to par?
In this beginner’s guide, we’ll provide you with step-by-step instructions and expert tips to help you set up a DIY home security system that fits your needs. From understanding the basics of home security systems to selecting the right equipment and optimizing its performance, we’ve got you covered.
So, whether you’re looking to enhance your home’s security or challenge the notion that professional systems are the only way to go, get ready to take control and protect what matters most to you.
Understanding the Basics of Home Security Systems
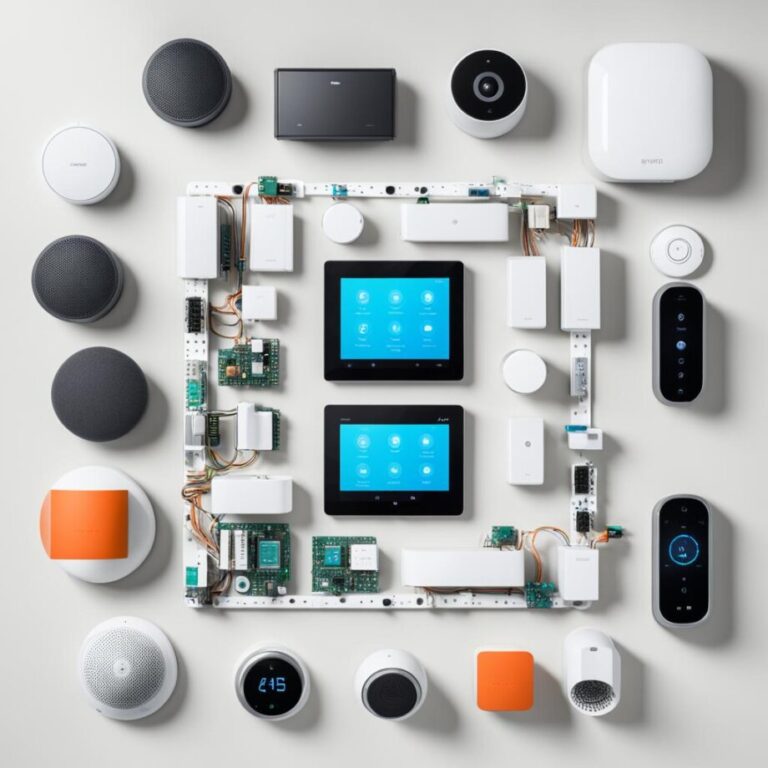
Before diving into the setup process, it’s essential to understand the basics of home security systems. By familiarizing yourself with the core components and features, you’ll be better equipped to create an easy DIY home security setup that meets your needs. Let’s explore the essentials together:
1. Sensors
These small devices play a crucial role in detecting any unauthorized entry or movement within your home. They come in various types, including window/door sensors, motion sensors, and glass break detectors. Sensors trigger alarms or notify you when they detect a breach, providing an early warning system for enhanced security.
2. Cameras
Cameras are valuable additions to any home security system, allowing you to monitor your property remotely. They provide visual evidence in case of an incident and act as a deterrent to potential intruders. Choose from indoor and outdoor options, wired or wireless, based on your specific requirements.
3. Control Panel
The control panel serves as the command center for your home security system. It allows you to arm or disarm your system, configure settings, and receive notifications. Choose a control panel that is user-friendly and integrates well with other components of your DIY setup.
4. Monitoring Options
Monitoring is an essential aspect of any home security system. It ensures that your property is protected even when you’re away. There are two main types: professional monitoring, where a third-party company monitors your system, and self-monitoring, where you receive alerts directly on your smartphone or other devices.
Understanding these home security system essentials will empower you to create a beginner-friendly setup catered to your needs. Armed with this knowledge, let’s proceed to the next steps of your DIY home security system installation.
Assessing Your Home Security Needs
Every home is unique, and so are its security needs. When it comes to home security installation, it’s crucial to assess your specific requirements to ensure optimal protection for your property and loved ones. By considering factors such as the size of your home, potential vulnerabilities, and your budget, you can make informed decisions when choosing the right equipment and features for your DIY home security system.
Here are some essential tips to help you assess your home security needs:
- Start by evaluating the size and layout of your home. Determine the number of windows, doors, and entry points that need to be secured.
- Identify potential vulnerabilities, such as secluded areas, blind spots, or dark corners, where intruders may take advantage.
- Consider your lifestyle and daily routines. Do you travel often or have long periods away from home? Are there specific security concerns you have based on your location?
- Assess your budget for home security installation. Determine how much you are willing to invest in your DIY system without compromising its effectiveness.
- Think about additional security features that may be beneficial, such as outdoor cameras, motion sensors, or smart locks.
Quotes:
Understanding your home’s unique security needs is the first step towards achieving peace of mind. By assessing vulnerabilities and tailoring your DIY system accordingly, you can enhance the safety of your home.”
– Security Expert, Emily Johnson
Once you have a clear understanding of your home security needs, you can proceed to the next steps of choosing and setting up your DIY home security system.
| Home Security Needs | Recommended Equipment and Features |
|---|---|
| Securing Doors and Windows | Door and window sensors, smart locks |
| Outdoor Surveillance | Outdoor cameras, motion sensors, floodlights |
| Interior Monitoring | Indoor cameras, motion sensors, glass break detectors |
| Smart Home Integration | Compatible smart home devices, voice control systems |
| Alarm and Notification Systems | Alarm sirens, mobile app notifications, email alerts |
Remember, no matter the size or budget, there is a DIY home security system available to meet your specific needs. Take the time to assess your requirements, and you’ll be well on your way to creating a secure and protected home environment.
Choosing the Right DIY Home Security System
With the plethora of options available, selecting the right DIY home security system can be overwhelming. But don’t worry, we’re here to help! Before you make a decision, it’s essential to evaluate different systems, compare features, and find one that matches your needs and budget. Follow our expert advice to feel confident in your choice.
Considerations When Choosing a DIY Home Security System
When choosing a DIY home security system, there are several key factors to consider:
- 1. Security Needs: Assess your specific security needs, including the size of your property, potential vulnerabilities, and the level of protection you desire.
- 2. Budget: Determine how much you’re willing to invest in your home security system, including any additional costs for monitoring services or professional installation.
- 3. Equipment and Features: Research the various types of sensors, cameras, control panels, alarm systems, and monitoring options available. Consider whether you need indoor and outdoor cameras, motion sensors, door/window sensors, or smart home integration capabilities.
- 4. User-Friendliness: Look for systems that are easy to install and operate, especially if you’re a beginner. Consider whether you prefer a system with a mobile app for remote access and control.
- 5. Customer Reviews and Support: Read customer reviews and ratings to gauge the reliability and satisfaction other users have experienced with different systems. Also, check if the manufacturer provides good customer support and warranty options.
Comparing DIY Home Security Systems
It’s crucial to compare different DIY home security systems to find the best fit for your needs. Consider the following aspects:
- 1. Equipment Packages: Look for systems that offer comprehensive equipment packages, including cameras, sensors, control panels, and necessary accessories. Some systems may also provide additional features like environmental monitoring or video storage.
- 2. Monitoring Options: Determine whether you prefer professional monitoring services or self-monitoring capabilities. Professional monitoring offers 24/7 surveillance and immediate response to alarms, while self-monitoring allows you to receive notifications directly on your smartphone.
- 3. Integration and Compatibility: Check if the system integrates with other smart home devices, such as smart locks, doorbells, or voice assistants like Alexa or Google Assistant. Compatibility with existing devices can enhance your overall home automation experience.
- 4. Mobile App Features: Evaluate the features offered by the mobile app, such as live camera feed access, alarm control, event notifications, and the ability to view recorded footage.
- 5. Contract and Pricing: Review the contract terms, cancellation policies, and pricing structures of different systems. Consider any additional costs, such as monthly monitoring fees or equipment rental fees.
Comparison of Top DIY Home Security Systems
| System | Features | Monitoring Options | Price Range |
|---|---|---|---|
| Brand A | HD cameras, motion sensors, smart home integration | Professional and self-monitoring | $-$$ |
| Brand B | Wireless sensors, video doorbell, mobile app | Professional and self-monitoring | $$ |
| Brand C | Indoor/outdoor cameras, two-way audio, smart locks | Professional and self-monitoring | $$$ |
Expert Tips for Choosing the Right System
Here are some expert tips to help you make an informed decision:
- Do Your Research: Take the time to research different systems, read customer reviews, and compare the pros and cons of each option. This will ensure you choose the system that best fits your requirements.
- Consider Scalability: If you plan to expand your system in the future, make sure the chosen system allows for easy integration and the addition of more devices.
- Think Long-Term: Consider the lifespan and reliability of the system. Investing in a high-quality system may save you money in the long run by avoiding frequent replacements or repairs.
By following these guidelines, you’ll be able to choose a DIY home security system that provides the protection and peace of mind you’re looking for. Keep in mind that every home is unique, so make sure to select a system that fits your specific needs and preferences. Remember, the goal is to create a secure and safe environment for you and your loved ones.
Installing and Placing Sensors and Cameras
Now comes the exciting part – installing the sensors and cameras. To ensure the effectiveness of your home security system, it’s crucial to strategically position your sensors and cameras in the right locations.
Entry Points: Start by placing sensors on all entry points of your home, such as doors and windows. This will provide an early alert if someone tries to gain unauthorized access.
Indoor Monitoring: Consider the areas inside your home that you want to monitor. For example, placing cameras in the living room, kitchen, and hallway can provide essential coverage. Ensure the cameras are discreetly placed for optimal visibility without compromising your privacy.
Outdoor Surveillance: If you want to monitor your property’s exterior, position cameras near your front and back doors, garage, and any other vulnerable areas. Weatherproof cameras with night vision capabilities are recommended to capture clear footage, regardless of the time of day or weather conditions.
Height and Angles: When installing cameras, aim for a height that covers the ideal viewing angle. Generally, placing them at eye level or slightly higher helps capture clear images and minimize blind spots.
Considerations: Take into account factors such as lighting conditions, obstructions, and the specific layout of your home. Test the camera and sensor angles to ensure they cover the intended areas effectively.
Expert Tip: It’s essential to review the coverage and placement of your sensors and cameras periodically. As your needs may change, it’s crucial to adapt your security setup accordingly. Regularly test and adjust the angles to maintain optimal security.

Recommended Placement for Sensors and Cameras
| Area/Location | Suggested Placement |
|---|---|
| Main Entry Door | Position a sensor on both sides of the door frame and place a camera above, capturing a clear view of the entrance. |
| Back or Side Door | Install a sensor on the door frame and place a camera to cover the entry point. |
| Windows | Deploy sensors on every accessible window, and optionally, position cameras to monitor vulnerable areas. |
| Garage | Install sensors on the garage door and consider a camera for monitoring the entrance. |
| Living Room | Place cameras strategically to cover the entire room while ensuring privacy. |
| Front Yard | Position weatherproof cameras near the entrance and other points of access outside your home. |
Setting Up Your Control Panel and Smart Home Integration
Now that you have all the necessary sensors and cameras in place, it’s time to set up your control panel and integrate your DIY home security system with your smart home devices. The control panel acts as the brain of your system, allowing you to monitor and control your home security from one centralized location.
Setting Up the Control Panel
To begin, follow these step-by-step instructions to set up your control panel:
- Locate a central area in your home where you want to install the control panel. It should be easily accessible but out of reach of potential intruders.
- Connect the control panel to a power source using the provided power adapter.
- Follow the manufacturer’s instructions to connect the control panel to your home’s Wi-Fi network.
- Once connected, you may need to enter the system’s unique identification code or activate the panel using the provided app or website.
- Configure your control panel settings, such as date, time, and alarm preferences, to fit your needs.
Once your control panel is set up, you can move on to integrating your DIY home security system with your smart home devices.
Integrating with Smart Home Devices
Integrating your DIY home security system with smart home devices allows for enhanced convenience and control. By connecting your system, you can automate certain actions and receive alerts on your smartphone or other smart devices. Here’s how:
- Identify the smart home devices compatible with your DIY home security system. Popular options include smart locks, smart lights, and voice assistants like Amazon Alexa or Google Assistant.
- Follow the manufacturer’s instructions to connect your smart home devices to your DIY system. This may involve installing specific apps, enabling skills, or using voice commands.
- Once connected, you can create automation rules to trigger actions based on specific events, such as disarming the system when your front door’s smart lock detects the correct PIN code.
- Configure notifications to receive alerts on your smartphone or other smart devices when the alarm is triggered or when specific events occur.
With smart home integration, you can enjoy the convenience of controlling your home security system through voice commands or mobile apps. You can even set up routines that automatically arm or disarm the system when you leave or arrive at home.
By following these steps to set up your control panel and integrate your DIY home security system with smart home devices, you’ll have a robust and convenient home security solution. The next section will guide you through configuring alarm and notification settings to further customize your system.
Configuring Alarm and Notification Settings
Once you have set up the physical components of your DIY home security system, it’s important to configure the alarm settings and notifications. This step ensures that your system is ready to detect and respond to any potential security threats.
Configuring alarm settings allows you to customize the volume, duration, and type of alarm that will be triggered in the event of a breach. By tailoring these settings to your preferences and the layout of your home, you can create an effective deterrent and response mechanism.
In addition to configuring the alarm, you can set up notifications through various channels to keep you informed about any security events. This allows you to be alerted regardless of your location, providing peace of mind and enabling you to take necessary actions promptly.
Configuring Alarm Settings
When configuring alarm settings, consider the following factors:
- Volume: Adjust the volume of the alarm to a level that is loud enough to alert you and potentially scare off intruders.
- Duration: Determine how long the alarm should sound once triggered. A longer duration can ensure that you are aware of the breach and can assess the situation.
- Type: Choose the type of alarm that suits your needs. Options may include sirens, strobe lights, or a combination of both.
Setting Up Notifications
Notifications are a crucial part of your DIY home security system as they keep you informed about any potential security breaches. Here’s how you can set up notifications:
- Email: Configure your system to send email notifications to your preferred email address. This allows you to receive real-time alerts and take appropriate action.
- SMS: Set up SMS notifications to receive text messages on your mobile device when a security event occurs. This ensures that you stay informed even if you don’t have access to your email.
- Mobile Apps: Many DIY home security systems have dedicated mobile apps that provide real-time notifications directly to your smartphone or tablet. Download and set up the app for instant alerts and peace of mind.
By configuring alarm settings and setting up notifications, you can ensure that your DIY home security system is optimized for your specific needs. This step completes the setup process and prepares your system to protect your home and loved ones.
Testing and Fine-Tuning Your DIY Home Security System
Once you have completed the installation of your DIY home security system, it’s crucial to test its functionality and performance. By conducting thorough tests and fine-tuning your system, you can ensure that it operates effectively and provides the protection you need.
To help you with this important step, here are some essential tests and tips:
1. Sensor and Camera Functionality
Check each sensor and camera to ensure they are properly working. Test the detection range and response time of your motion sensors and door/window sensors. Verify that your cameras are capturing clear footage and that their viewing angles cover the desired areas.
2. Alarm System Testing
Test your alarm system by activating each sensor individually. Trigger your sensors, such as motion detectors or door/window sensors, to ensure they trigger the alarm promptly. Verify that the alarm sound is loud and audible throughout your home.
3. Notification System Setup
Configure your notification settings, such as email or mobile app alerts, to receive notifications when your security system detects any suspicious activity. Test these notifications to ensure they are received promptly and contain accurate information.
4. Eliminating False Alarms
Adjust the sensitivity settings of your sensors, especially motion detectors, to reduce false alarms triggered by pets, moving objects, or environmental factors. Fine-tune the settings until you find the right balance between sensitivity and accuracy.
5. System Integration
If you have integrated your DIY home security system with other smart home devices, test their compatibility and functionality. Make sure that your security system can seamlessly control and interact with your smart lights, locks, and other connected devices.
| Test | Steps | Results |
|---|---|---|
| Sensor and Camera Functionality | Activate each sensor and camera individually to test their proper functioning. | All sensors and cameras are working correctly, and the captured footage is clear and accurate. |
| Alarm System Testing | Trigger each sensor to ensure the alarm system is activated promptly and producing the intended sound. | The system reacts quickly to sensor triggers, and the alarm sound is loud and audible. |
| Notification System Setup | Configure notification settings and send test alerts to verify their prompt delivery. | Notifications are received promptly and provide accurate information about detected activity. |
| Eliminating False Alarms | Adjust the sensitivity settings of motion detectors and other sensors to reduce false alarms. | False alarms are minimized, ensuring accurate detection of real security threats. |
| System Integration | Check the integration and functionality of your DIY security system with connected smart home devices. | The system seamlessly integrates with smart devices, allowing control and interaction for enhanced security. |
By conducting these tests and fine-tuning your DIY home security system, you can optimize its performance and ensure that it meets your security needs effectively.
Conclusion
Establishing a DIY home security system is an attainable goal for beginners. By following this beginner’s setup guide, you now have the knowledge and confidence to protect your home. Take the necessary steps to secure your property and enjoy peace of mind with a customized DIY home security system.
Investing in a DIY home security system allows you to tailor your setup to meet your specific needs without breaking the bank. With the right equipment and strategic placement of sensors and cameras, you can effectively deter potential intruders and monitor your home from anywhere.
Remember, the safety of your loved ones and belongings is in your hands. Take advantage of the advancements in technology and make your home a safer place. With a little time and effort, you can create a comprehensive security system that will provide you with the peace of mind you deserve.